How To Install an Electric Dryer Safely and Efficiently?
Installing an electric dryer may seem like a daunting task, but with the right knowledge and guidance, you can do it safely and efficiently. Whether you’re replacing an old dryer or setting up a new one, proper installation is crucial to ensure optimal performance and prevent potential hazards.
In this guide, we’ll walk you through a step-by-step process for how to install an electric dryer, addressing essential considerations, electrical preparations, location selection, venting system installation, and post-installation checks. By following these guidelines, you’ll be able to enjoy the benefits of a fully functional and reliable electric dryer in your home.
Step-by-Step Guide: How to Install an Electric Dryer?
Step 1: Pre-Installation Preparation
- Review the manufacturer’s guidelines and specifications provided in the user manual to understand the specific requirements for your electric dryer model.
- Verify that your home’s electrical supply meets the dryer’s voltage and amperage requirements. If necessary, hire a qualified electrician to install or modify a dedicated 240-volt electrical circuit.
- Gather all the necessary tools and materials, including a screwdriver, pliers, level, measuring tape, utility knife, vent duct, vent clamps, and foil tape.
Step 2: Selecting the Installation Location
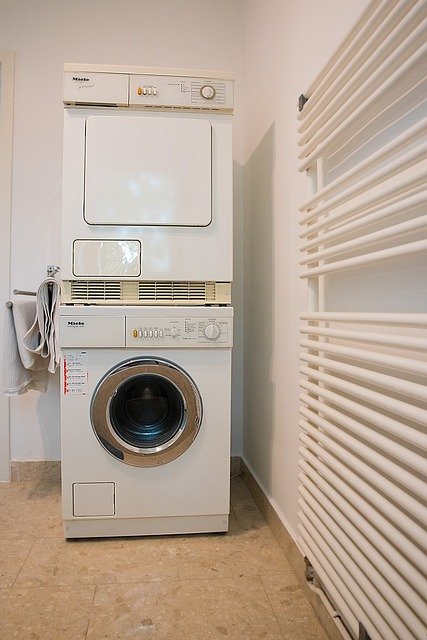
- Choose a suitable location for your electric dryer near an exterior wall. This facilitates proper venting to expel hot, moist air outside.
- Ensure there is enough space for the dryer, allowing adequate clearance from walls, other appliances, and any obstructions.
Step 3: Electrical Connection
- Turn off the power at the circuit breaker or fuse box to the designated outlet for the dryer, Read what size breaker for electric dryer guide.
- Remove the cover plate on the back of the dryer to access the terminal block.
- Attach the power cord to the terminal block following the manufacturer’s instructions. Typically, there are three or four wires to connect: two hot wires (black and red), a neutral wire (white or gray), and a ground wire (green or bare copper).
- Securely fasten the wires to the terminal block with screws or other fasteners provided by the manufacturer.
- Install a strain relief on the power cord to prevent accidental disconnection.
- Double-check all connections to ensure they are secure.
Step 4: Ventilation System Installation
- Position the electric dryer near the vent opening on an exterior wall or floor.
- Attach one end of the vent duct to the dryer’s exhaust outlet using a clamp or fastener.
- Route the other end of the vent duct to the designated vent opening.
- Securely fasten the vent duct to both the dryer and the vent opening using clamps or foil tape.
- Ensure the vent duct is as straight as possible with minimal bends to maintain optimal airflow.
Step 5: Leveling and Adjustments
- Use a level to ensure the electric dryer is perfectly horizontal.
- Adjust the dryer’s legs as needed to achieve a level and stable position.
- Confirm that the dryer has a firm footing and doesn’t wobble or rock.
Step 6: Final Safety Checks
- Recheck all electrical connections and ensure they are tight and secure.
- Inspect the vent duct for any air leaks and make necessary adjustments.
- Verify that all screws, bolts, and fasteners are tightened properly.
- Check for any loose parts or components and address any issues.
Step 7: Testing and Operation
- Plug the power cord into the dedicated 240-volt electrical outlet.
- Turn on the power at the circuit breaker or fuse box.
- Run a short drying cycle with a few damp towels or clothes to test the dryer’s functionality.
- Monitor the dryer during the cycle for proper heating, airflow, and operation.
Remember, if you encounter any challenges or uncertainties during the installation process, seek assistance from a professional electrician or technician to ensure a safe and successful installation.
How do I hook up an electric dryer?
How do I connect the power cord to the electric dryer?
- Start by unplugging the dryer and ensuring the power is off at the circuit breaker.
- Remove the cover plate from the back of the dryer to access the terminal block.
- Attach the power cord to the terminal block following the manufacturer’s instructions. Typically, there are three or four wires to connect: two hot wires (black and red), a neutral wire (white or gray), and a ground wire (green or bare copper).
- Strip the wires as needed and insert them firmly into the corresponding terminals. Secure them with screws or other fasteners provided by the manufacturer.
Ensure there are no loose wires and that the cord is properly secured to the dryer.
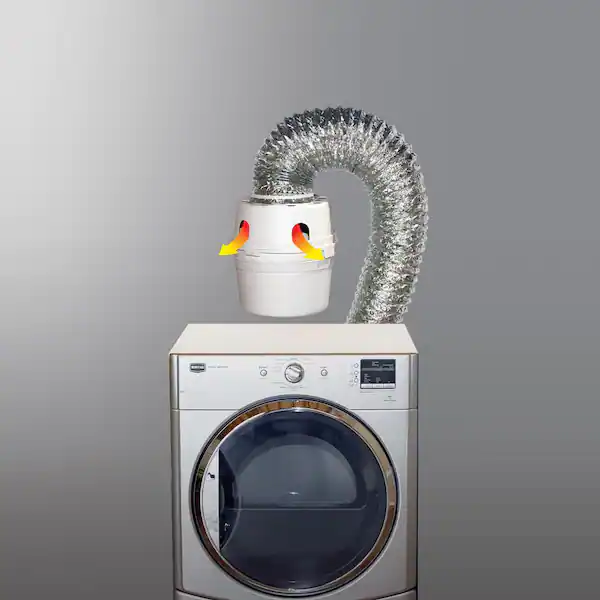
How do I connect the vent duct to the electric dryer?
- Locate the dryer’s exhaust outlet on the back panel.
- Attach one end of the vent duct to the exhaust outlet using a clamp or fastener. Ensure it is tightly secured to prevent any air leaks.
- Route the other end of the vent duct to the appropriate vent opening on the wall or floor. Again, use a clamp or fastener to secure it in place.
- Check that the vent duct is as straight as possible with minimal bends to maintain optimal airflow.
How do I plug in the electric dryer and test the connection?
- Carefully move the dryer into its final position, ensuring it is level and has proper clearance from walls and other obstacles.
- Plug the power cord into the dedicated electrical outlet. Make sure the plug fits securely and that there are no loose connections.
- Turn on the power at the circuit breaker or fuse box.
- Test the electric dryer by running a short drying cycle with a few damp towels or clothes. Monitor its performance and listen for any unusual noises.
How do I check for proper ventilation and airflow?
During the drying cycle, verify that hot, moist air is being expelled through the vent duct to the outside of your home.
Check the exterior vent opening for proper airflow. Ensure there are no obstructions, such as bird nests or debris, blocking the vent. Read does an electric dryer need a vent blog post.
What additional safety measures should I consider?
Install a proper strain relief on the power cord to prevent it from being accidentally pulled out.
Never use an extension cord to connect the dryer to the power outlet; it can lead to overheating and pose a fire hazard.
Regularly clean the lint filter and the vent duct to maintain efficient airflow and prevent lint buildup, which can cause fire risks.
By following these steps, you can safely and effectively hook up your electric dryer for optimal performance and longevity. Always refer to the manufacturer’s instructions for specific guidelines and safety recommendations related to your dryer model. Read about what is washer dryer hookup meaning If you are unsure about how to install an electric dryer or any aspect of the installation process, consider seeking assistance from a professional to ensure a successful and safe hookup.
How do I prepare for the electric dryer installation?
What are the important considerations before installation?
Before proceeding with the electric dryer installation, it’s crucial to consider a few essential factors to ensure a smooth and successful process. Firstly, check the manufacturer’s guidelines and specifications provided in the user manual. These instructions will outline specific requirements for your dryer model and help you avoid potential installation mistakes.
Secondly, verify the compatibility of your electric dryer with the electrical supply in your home. Ensure that the voltage and amperage requirements of the dryer match the electrical outlet’s capacity to prevent electrical issues or damage to the appliance.
What tools and materials do I need for the installation?
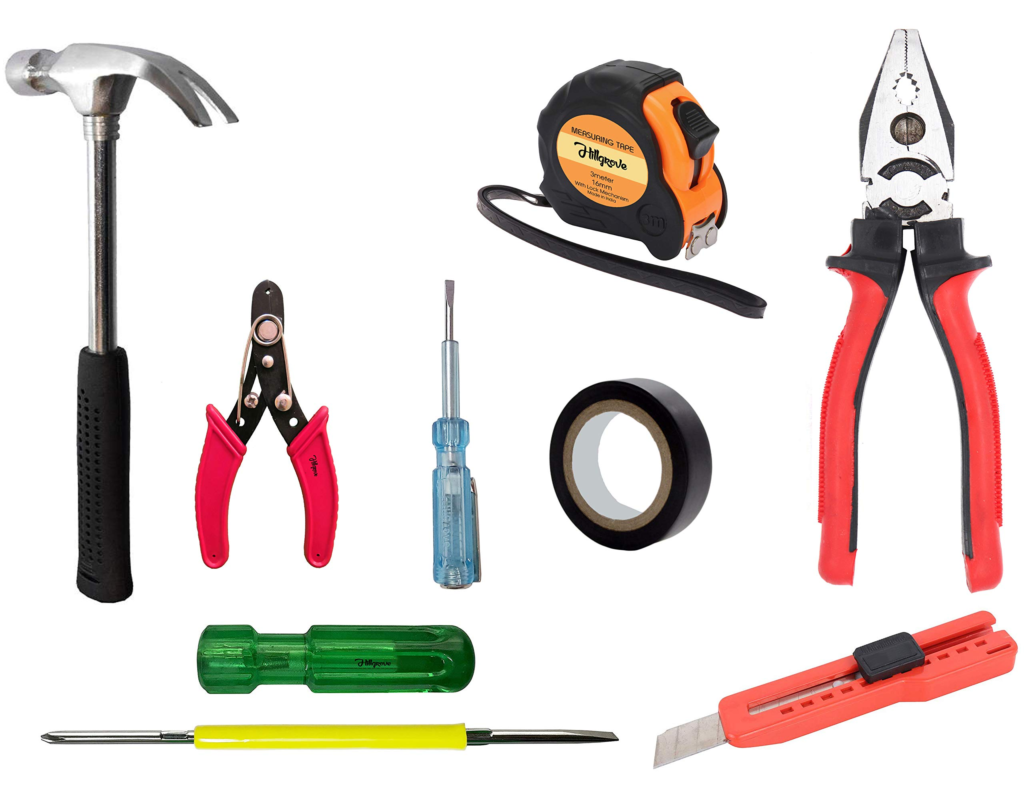
Having the right tools and materials is vital for a hassle-free installation. Make sure to gather a few basic tools such as a screwdriver, pliers, level, measuring tape, and a utility knife. Additionally, you’ll need appropriate materials such as vent ducts, fasteners, and sealants for the ventilation system.
How do I ensure the installation site is suitable?
Choosing the correct location for your electric dryer is critical for safety and efficiency. Pick a well-ventilated area, preferably near an exterior wall, to facilitate proper airflow and venting. Ensure there is enough space for the dryer, with ample clearance from walls and other appliances, to avoid overheating and potential fire hazards.
How do I handle the electrical preparations?
How do I safely shut off the power supply?
Before starting any electrical work, locate your home’s circuit breaker or fuse box and turn off the power supply to the designated outlet for the dryer. This step is essential to prevent electrical shocks and ensure your safety during the installation process.
What are the voltage and amperage requirements?
Refer to the manufacturer’s specifications to determine the specific voltage and amperage requirements for your electric dryer model. Make sure that the electrical circuit can handle the dryer’s power needs to avoid overloading and potential damage to both the appliance and the electrical system.
How do I install or modify the dedicated circuit?
If your electrical circuit doesn’t meet the dryer’s requirements, you may need to install a dedicated circuit for the appliance. This typically involves hiring a qualified electrician to handle the wiring and ensure compliance with local electrical codes.
What electrical components need checking or replacement?
Before connecting the electric dryer, inspect the electrical components such as power cords and plugs for any signs of damage. If you notice any issues, replace the damaged parts with new ones to guarantee a secure and safe electrical connection. Remember to follow the manufacturer’s guidelines for replacement parts.
How do I select the right location for the dryer?
What factors should I consider for optimal placement?
Selecting the ideal location for your electric dryer is crucial for its overall performance and safety. Consider placing the dryer near an exterior wall to facilitate proper venting. This setup allows the hot, moist air to be efficiently exhausted outside, reducing the risk of mold growth and potential damage to your home’s interior.
How do I address ventilation requirements and ductwork?
Proper ventilation is essential to prevent lint buildup and maintain the dryer’s efficiency. Choose the appropriate venting material, such as rigid metal ducts, as they offer better airflow compared to flexible ducts. Position the vent duct in a straight path with minimal bends to minimize resistance and optimize the drying process.
What are the clearance requirements for safe installation?
Maintaining sufficient clearance around the dryer is crucial for both safety and efficient operation. Leave at least three inches of space between the back of the dryer and the wall to avoid damaging the vent hose and electrical cord. Additionally, ensure there is ample space around the dryer’s sides and top to prevent overheating and allow proper ventilation.
How do I install the ventilation system?
What type of venting material and components do I need?
Selecting the right venting materials is vital to ensure a properly functioning ventilation system. Choose rigid metal ducts instead of plastic or flexible ones, as they are less prone to sagging and provide better airflow. Additionally, invest in high-quality vent covers and hoods to prevent pests and debris from entering the system.
How do I correctly position the dryer vent?
Positioning the dryer vent correctly is crucial for efficient airflow and venting. Ensure the vent opening on the back of the dryer aligns perfectly with the exhaust duct. Any misalignment can lead to leaks, reduced efficiency, and potential lint buildup, posing a fire hazard.
What steps are involved in securely connecting the venting system?
Securely connecting the venting system is vital to prevent air leaks and maintain efficient drying performance. Use appropriate fasteners such as clamps or foil tape to secure the joints between duct segments. Avoid using duct tape as it tends to deteriorate over time and may lead to air leaks.
How do I ensure proper airflow and functionality?
After installing the venting system, carefully inspect it for any obstructions or bends that could impede airflow. Test the dryer’s operation to ensure hot air is being effectively expelled through the vent. Regularly clean the vent system to prevent lint buildup, which can hinder airflow and pose a fire risk.
How do I handle delivery, unpacking, and inspection?
How do I safely transport the electric dryer to the installation site?
Transporting the electric dryer safely is essential to avoid damage to the appliance and prevent personal injuries. Use a dolly or hand truck to move the dryer, ensuring you have assistance to prevent tipping or accidents.
What is the correct way to unpack the dryer and remove packaging materials?
Carefully unpack the dryer, following the manufacturer’s instructions. Remove all packaging materials, including plastic wraps and foam inserts, to ensure they don’t interfere with the dryer’s functionality or ventilation.
How do I inspect for any shipping damages or defects?
Thoroughly inspect the dryer for any shipping damages or defects. Look for dents, scratches, or any visible signs of damage. Check the power cord and plug for any issues. If you notice any problems, contact the retailer or manufacturer promptly to address the situation.
Remember, following the proper installation guidelines and safety measures is essential to ensure your electric dryer operates efficiently and safely. If you’re uncertain about any step in the installation process, consider seeking assistance from a professional to guarantee a successful installation.
How do I level and adjust the dryer?
How do I use a level to ensure the dryer is horizontal?
Using a level is crucial to ensure the electric dryer is perfectly horizontal. Place the level on top of the dryer and adjust the legs until the bubble in the level is centered. This step prevents the dryer from vibrating excessively during operation and helps maintain its stability.
How do I adjust the dryer legs for stability?
Most dryers come equipped with adjustable legs to accommodate uneven flooring. Use a wrench or pliers to adjust the legs, ensuring all four corners are firmly and evenly touching the ground. This prevents the dryer from rocking or tilting during use.
How do I ensure the dryer has a firm and stable footing?
After leveling and adjusting the legs, gently rock the dryer to check for stability. If you notice any wobbling or movement, recheck the leg adjustments. A firm and stable footing reduces noise, prevents potential damage to the floor, and ensures the dryer operates optimally.
How do I connect the power supply?
How do I position the dryer near the electrical outlet?
Carefully move the dryer into position near the designated electrical outlet. Avoid damaging the power cord during this step by ensuring it doesn’t get pinched or trapped under the appliance.
What is the correct way to plug the dryer into the dedicated power supply?
Double-check the dryer’s plug and the outlet to ensure they match in terms of shape and voltage. Plug the dryer into the dedicated outlet firmly but gently. Ensure there are no loose connections, as they can lead to overheating and potential electrical hazards.
How do I secure the plug and verify the connection?
Once the plug is inserted into the outlet, secure it by tightening any retention screws or locking mechanisms. Inspect the plug and cord for any damage, and replace them immediately if any issues are found. Finally, verify the connection by testing the dryer’s power on/off button or controls to ensure it’s functioning correctly.
How do I connect the vent duct?
How do I attach the dryer’s exhaust duct to the venting system?
Carefully attach the dryer’s exhaust duct to the venting system using appropriate connectors or clamps. Ensure the connection is tight and secure to prevent any air leaks.
What fasteners and sealants should I use for a secure connection?
Use high-quality metal clamps or foil tape to fasten the ductwork securely. Avoid using screws or nails, as they can disrupt airflow and cause lint buildup. Apply foil tape or duct sealant to seal any joints or seams to prevent air leakage.
How do I check for and address any air leaks?
After connecting the vent duct, conduct a thorough inspection for any potential air leaks. Run the dryer briefly and feel around the connections for any air escaping. If you detect any leaks, tighten the connections or reapply the sealant to ensure a tight and efficient seal.
How do I recheck the power supply and vent connections?
Before completing the installation, double-check the power supply and vent connections to ensure they are secure and properly aligned. Loose connections can cause performance issues and pose safety risks.
What steps should I take to ensure all screws, bolts, and fasteners are tightened?
Inspect all screws, bolts, and fasteners used during the installation process and tighten any loose ones. This step helps prevent potential hazards caused by loose components.
How do I inspect for any loose parts or components?
Conduct a thorough inspection of the entire dryer to ensure there are no loose parts or components. Check the control panel, knobs, and any accessories to make sure everything is securely in place.
By following these safety checks, you can be confident that your electric dryer installation is secure and meets safety standards.
How do I test the electric dryer after installation?
How do I power on the dryer and verify proper operation?
After completing the installation, power on the electric dryer and check for any error messages or unusual noises. Run a short drying cycle to verify that the dryer is working correctly.
What should I monitor during the first drying cycle?
During the first drying cycle, pay attention to the dryer’s performance. Ensure that it’s producing adequate heat and effectively drying the clothes. Monitor for any excessive vibrations or abnormal odors, which might indicate a problem that needs addressing.
How do I confirm proper ventilation and airflow?
During the drying cycle, inspect the venting system to ensure hot, moist air is being adequately expelled outside. Check the vent’s exterior opening to ensure it opens and closes properly and is free from any obstructions or lint buildup.
FAQ About How To Install an Electric Dryer
Do you just plug in an electric dryer?
No, simply plugging in an electric dryer is not sufficient for installation. Electric dryers require a dedicated 240-volt electrical outlet to power them. You’ll need to connect the dryer’s power cord to the outlet following the manufacturer’s instructions. Additionally, proper venting is essential to expel hot, moist air outside, so you’ll need to attach the dryer’s vent duct to a vent opening on an exterior wall or floor.
What hookup is needed for an electric dryer?
To hook up an electric dryer, you need the following:
A dedicated 240-volt electrical outlet (NEMA 14-30R) with the appropriate amperage for the dryer’s requirements.
A compatible power cord with the correct plug type for your electrical outlet and the appropriate wires for connecting to the dryer’s terminal block.
A vent duct to expel hot air and moisture outside. Use rigid metal ducts for better airflow and safety.
Fasteners and sealants to secure the vent duct and prevent air leaks.
Are electric dryers easier to install?
Generally, electric dryers are easier to install compared to gas dryers. Electric dryers do not require a gas line, so there’s no need for gas connections or venting for combustion gases. As long as you have the proper electrical outlet and venting setup, the installation process for electric dryers is typically straightforward. However, we still recommend following the manufacturer’s guidelines and safety precautions during installation.
Can you plug an electric dryer into any outlet?
No, you cannot plug an electric dryer into just any outlet. Electric dryers require a dedicated 240-volt electrical outlet, also known as a 30-amp outlet (NEMA 14-30R). These outlets have different prong configurations and voltage compared to standard 120-volt outlets used for smaller household appliances. Attempting to plug an 120 volt electric dryer into the wrong outlet can damage the appliance and pose significant safety hazards.
Always ensure that your electric dryer’s power cord matches the outlet’s configuration and voltage before attempting to plug it in. If your home doesn’t have the correct outlet, consult a qualified electrician to install one before connecting the dryer.
Conclusion
Why is proper electric dryer installation important?
Proper electric dryer installation ensures optimal performance, enhances safety, and extends the lifespan of the appliance. Following the correct installation procedures helps prevent potential electrical hazards and reduces the risk of dryer-related fires.
What are the key safety measures to follow?
Adhering to safety measures, such as shutting off the power supply during installation, checking for loose connections, and following manufacturer’s guidelines, significantly reduces the risk of accidents or malfunctions.
When should I seek professional help for installation?
If you encounter any challenges during the installation process or lack confidence in your abilities on how to install an electric dryer or handle electrical connections or venting, it’s best to seek professional assistance. Certified technicians can ensure a safe and proper installation, giving you peace of mind and preventing potential risks.